Lab 1 - Artemis

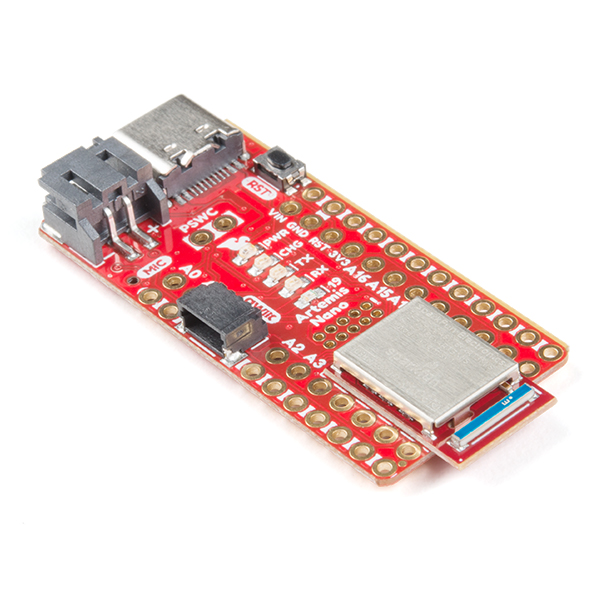
The objective of Lab 1 is to set up the Artemis board, test different programs, and become familiar with the Bluetooth connection.
PART 1
Prelab
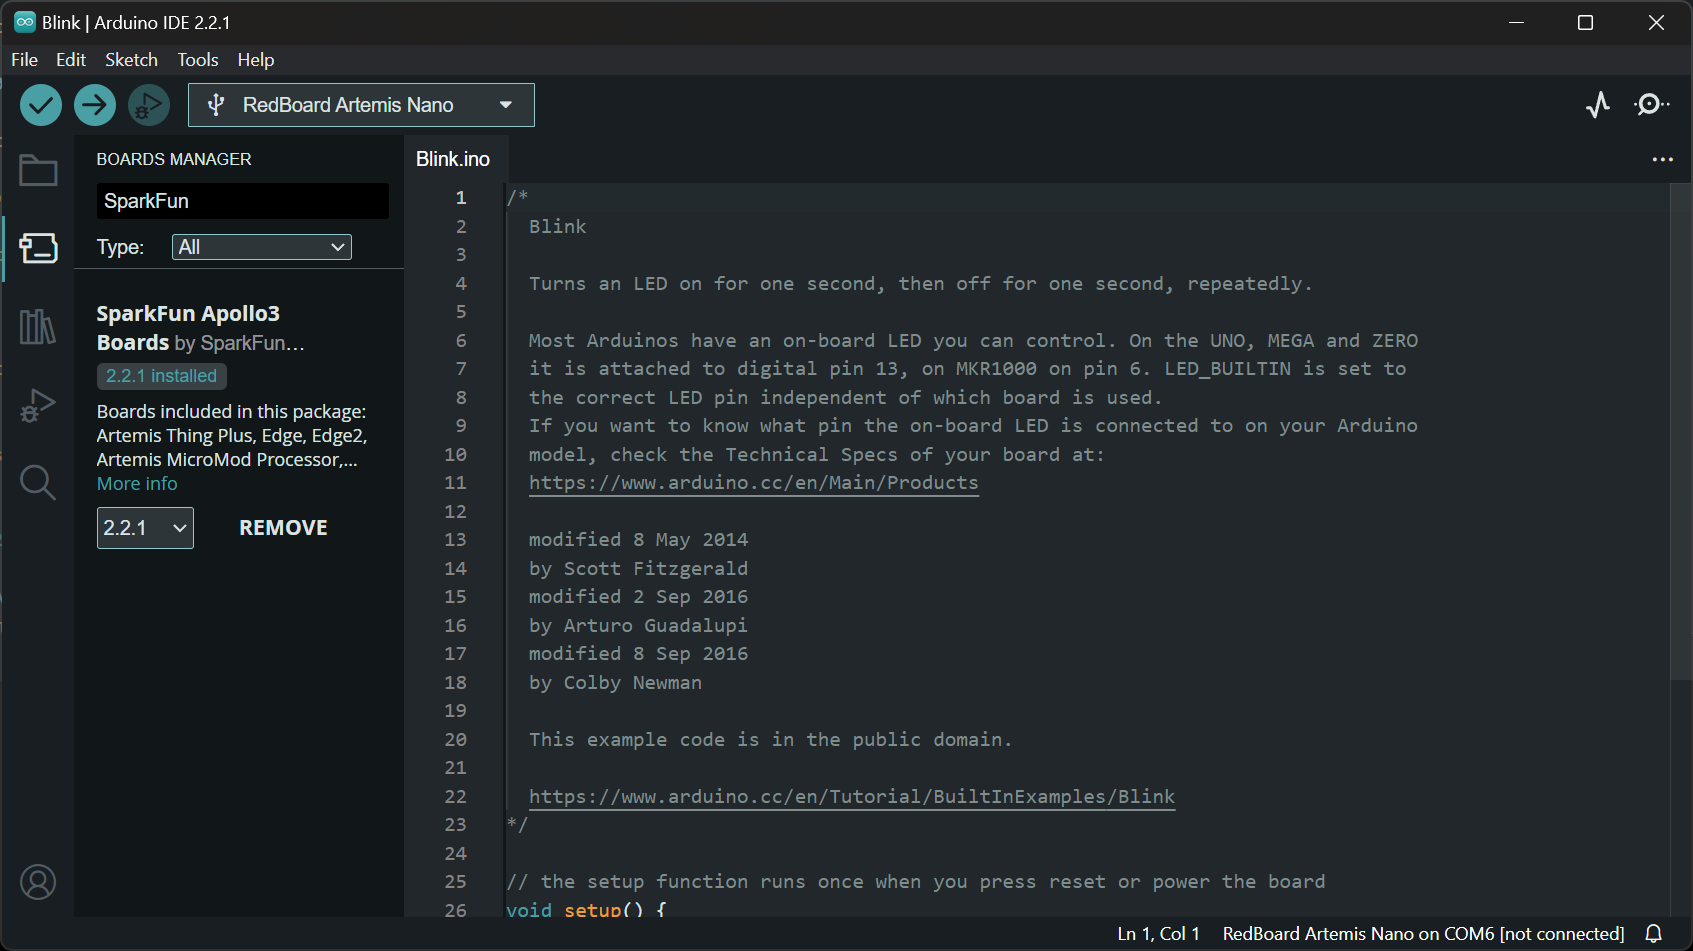
The prelab for Part 1 consists on installing the Arduino IDE, as well as the Artemis board support software.

Tasks
Now, we will test different components of the board, with examples from the IDE.
1. LED Blink
The purpose of this task is to learn how to connect the Artemis board to the computer. A blue LED will turn ON for 1 second, and then turn OFF for another seconds.
2. Serial Input/Output
This program tests the Serial Monitor. The monitor will display everything that gets typed in.
3. Analog reading - Temperature sensor
This section tests the temperature sensor of the Artemis. When heat is applied to the chip, the temperature recorded increases, as can be seen on the second column of the results. The opposite happens when the chip is cooled.
4. Microphone test
The board can also determine the frequency of the sound thanks to a microphone. I used a YouTube video that sweeps across a wide range of frequencies. The Artemis board is able to determine frequencies from 90Hz to 20kHz.
Conclusion
After ensuring that everything works well, can proceed to the next part, where we will connect the Artemis to the computer via Bluetooth. With BLE we will be able to send commands and receive data from the Artemis wirelessly.
PART 2
Prelab
The prelab for Part 2 consists of setting up the computer and the Artemis in order to be able to receive and send data through BLE, for which we will use Python. Additionally, we need to create a virtual environment for this project. Python can be installed from their website. After this process is finished, we need to set up the virtual environment:
1
py -m pip install --user virtualenv
Next, we need to create the virtual environment inside the project directory:
1
py -m venv FastRobots_ble
The virtual environment can be activated using:
1
source FastRobots_ble/bin/activate
To deactivate it, we just need to run deactivate. With the virtual environment active, we need to install the necessary Python packages:
1
pip install numpy pyyaml colorama nest_asyncio bleak jupyterlab
Whenever we want to run our code, we will first need to activate the virtual environment, and then start Jupyter by running:
1
jupyter lab
Configuration
We need to configure a few parameters in order for the Artemis to communicate with our computer. The ArduinoBLE library should be installed (Tools > Manage Libraries...). This lab comes with a codebase, that contains all the code needed. Its main files are demo.ipynb, wich contains the Python code that will run on the computer, and ble_arduino.ino, which will be executed in the Artemis.
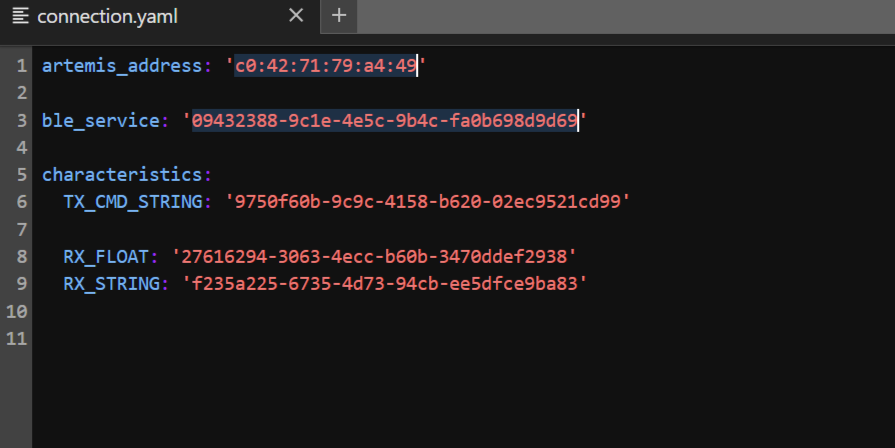
When we run ble_arduino.ino, the Serial Monitor will print its MAC address. We need to change the MAC address included in the file connection.yaml, within the Python codebase, with the address displayed by the Artemis.

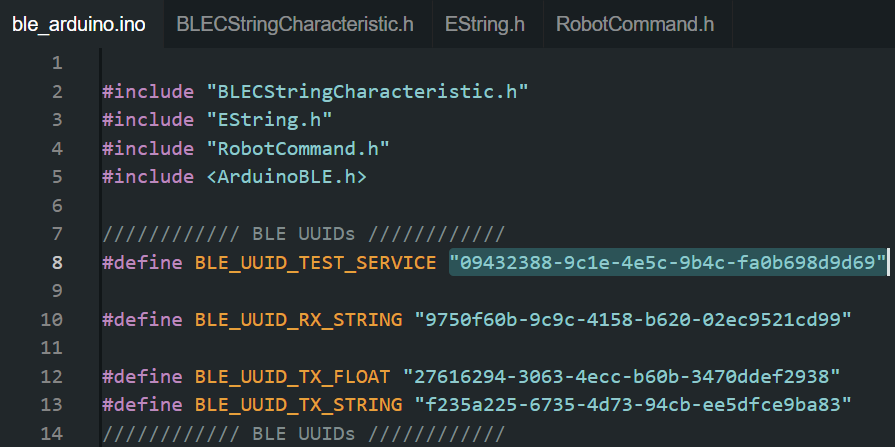
Additionally, we need to create a new UUID (identifiers that differentiate the data from our Artemis) and replace the BLEService UUID value both in the connection.yaml file, as well as in the ble_arduino.ino file. We can create a new UUID with the following command:
1
2
from uuid import uuid4
uuid4()
The files connection.yaml and ble_arduino.ino will look as follows, respectively. Note how the BLEService UUID and the MAC address match in both files.
 |
 |
While trying to connect my computer to the Artemis via Bluetooth I faced some problems. The solutions were simple:
- First, make sure that the Bluetooth setting is turned ON in my computer.
- Next, as I’m running Windows 11, in the
base_ble.pyfile, change line 53 fromif OS_PLATFORM == "Windows" or OS_PLATFORM == "Linux":toif True:.
After applying these chages my problems were solved, and my computer could connect to the Artemis.
Codebase
Before getting into the Tasks, let’s go through some basic functions of the codebase that will be used later on.
- The Artemis has a unique MAC address, as well as an UUID, used to communicate with the computer.
- The data sent over Bluetooth are BLExCharacteristics. In general, we will send and receive strings.
- The functions that we will use are included in the
ble.pyfile. The most relevant are:connect()anddisconnect(), used to establish Bluetooth connection with the Artemis;send_command(cmd_type, data), used to send a command to the board. It needs a command, and some data;receive_string(uuid), used to receive a string from our board. We need to specify the UUID of the characteristic with theuuid()function;start_notify(uuid, notification_handler), used to activate notifications. It also needs a UUID, and the function that will be executed;bytearray_to_string(byte_array), used to convert the data received into a string;- and
uuid(), used to select the specific UUID, stored inconnection.yaml.
- All the commands have to be stored in
cmd_types.py, with propper enumeration; as well as inenum CommandTypes {}insideble_arduino.ino.
Now, let’s run the code in demo.ipynb to make sure that everything works properly.
Tasks
1. ECHO command
This first task is simple: send an ECHO command to the Artemis and receive the string on the computer. This command is already included in the Artemis codebase, but we need to modify it. Now, whenever the board receives that command, it will send back a string that says Robot says -> [the string sent to the board] :). It will also print this message on the Serial Monitor. When sending the command, we include whatever text we want echoed in the data argument. We will then print the string:

2. GET_TIME_MILLIS command
The next task involves creating a new command, GET_TIME_MILLIS, that will obtain the time from the Artemis, and send back a string with the format T:[time]. The time in the Artemis can be obtained with millis(). I divided the time by 1000 in order to obtain seconds. This command doesn’t need any additional input, so the argument data is empty.

3. Notification Handler
This task involves creating a notification handler. This is a function that gets executed every time the Artemis sends a message, without the need to explicitly run the command receive_string(uuid). To set it up, we need to define a function that will be executed (notification_handler_3), and then call the function start_notify to activate notifications. The notification_handler_3 function must receive the UUID and the byte array as arguments; while start_notify needs the UUID and the notification handler function. The former will convert the byte array sent by the Artemis into a string, and then extract the time as a float. Both the string and the time will be stored as global variables in case I later want to work with them.
1
2
3
4
5
6
7
8
9
10
11
def notification_handler_3(uuid, byte_array):
    global string
    string = ble.bytearray_to_string(byte_array)
    global time_stamp
    time_stamp = float(string[2:])

if first_connection:
    first_connection = False
else:
    ble.stop_notify(ble.uuid['RX_STRING'])
ble.start_notify(ble.uuid['RX_STRING'], notification_handler_3)
Note that I have added some code before calling the start_notify function. Its purpose is to stop notifications previously started. After starting the notification, whenever I send the command GET_TIME_MILLIS, the computer will receive it and print it without the need to run receive_string(uuid).
4. GET_TIME_MILLIS_LOOP command
For this task, we have to create a loop that collects the time and sends it to the computer for a few seconds. I will create a new command, GET_TIME_MILLIS_LOOP, that will collect the time and send it to the computer repeatedly, during 5 seconds.
1
2
3
4
int time_init = millis();
while((millis() - time_init) < 5000){
    /*Get the time and send it to the computer*/
}
Additionally, I will modify the notification handler so that it stores every time stamp in a list:
1
time_stamps.append(float(string[2:]))
After the command is sent, all the time stamps will be stored in a list. When the job is done, I will print the number of time stamps inside the list with len(time_stamps).

In my case, the board sent 341 messages in 5 seconds. Each message was a string of 8 characters; which means each string is 64 bits. Therefore, the data transfer rate is (21824 bits / 5 seconds) = 4365 bits/s.
5. SEND_TIME_DATA command
This time, we will collect all the data points, store them in an array, and then loop through the array to send all those values. For this example I will collect 10 data points (#define N 10). The code for this new command, SEND_TIME_DATA, will have the following structure:
1
2
3
4
5
6
7
for(int i=0; i<N; i++){
    /*Store time in an array*/
}

for(int i=0; i<N; i++){
    /*Send each value of the array as a string*/
}
The notification handler is the same as the previous task. However, this time I will print the whole list when the task is ended. Note that all the data points are 500ms apart. That is due to a delay added in the code, because otherwise the Artemis will be very fast recording time data.

6. GET_TEMP_READINGS command
The last command, GET_TEMP_READINGS, will record the temperature at the same time that we record the time; and store both in different arrays. This time, there will be a 1 second delay between every recording. To record the temperature we will use the command getTempDegC(), that returns a float. Then, we will loop through both arrays and send both data points in a single string. The string sent in this case will have the following structure: Time:[time] Temp:[temperature].
1
2
3
4
5
6
7
8
for(int i=0; i<N; i++){
    /*Store time_i in an array*/
    /*Store temperature_i in an array*/
}

for(int i=0; i<N; i++){
    /*Get each the value of time_i and temperature_i and send them in a single string*/
}
The notification handler in this task varies slightly. As we are sending two data points in a single string, in order to parse the data we need to use the split() function, and then store both values in their respective arrays.
1
2
3
4
5
temp_i=string.split(":",2)[-1]
time_i=(string.split(":",1)[1]).split(" ",1)[0]

timeData.append(float(time_i))
tempData.append(float(temp_i))
After running the command, we will print the time stamp with its respective temperature.

7. Differences between Methods
The first method to record data, while slower, gives us the ability to receive data in real time. The second method is faster, as it doesn’t have to send the data before recording again; but we lose the real time capabilities. In order to determine how fast the second method is, I will modify slightly the command in task 6, so that there’s no delay between recordings and it will record 100 times. In this case, the first time stamp is 18.452s, and the 100th is 18.480s. Therefore, data has been recorded every 0.28ms. Now, let’s consider the previous task, where we store two floats of 4 bytes each. This means every data point is 8 bytes. If the Artemis has 384kB of RAM, we could store up to 48000 data points. If we include the string that we send every time, that has 22 characters (22 bytes), we would lose space for 3 data points.
Conclusion
In this lab we have learned how to connect the Artemis board to the computer in order to load code. We have also learned how to connect the computer to the Artemis via Bluetooth, and two methods to effectively send and receive data over it.