Lab 11 - Localization (Real)
The objective of Lab 11 is to implement the update step of the Bayes Filter on the actual robot.
Prelab
The prelab of this lab consists of revisiting lectures about Sensors and Bayes Filter, and review Lab 10.
Tasks
As the motion models of the robot are very noise and not reliable, only the update step of the Bayes Filter will be implemented on the robot. A base code was provided in the lab handout to implement the Bayes Filter, both in simulation and on the robot.
1. Simulation
The simulation code was already provided. After running it, it produced similar results to those from Lab 10.
| Simulation from Lab 11 | Simulation from Lab 10 |
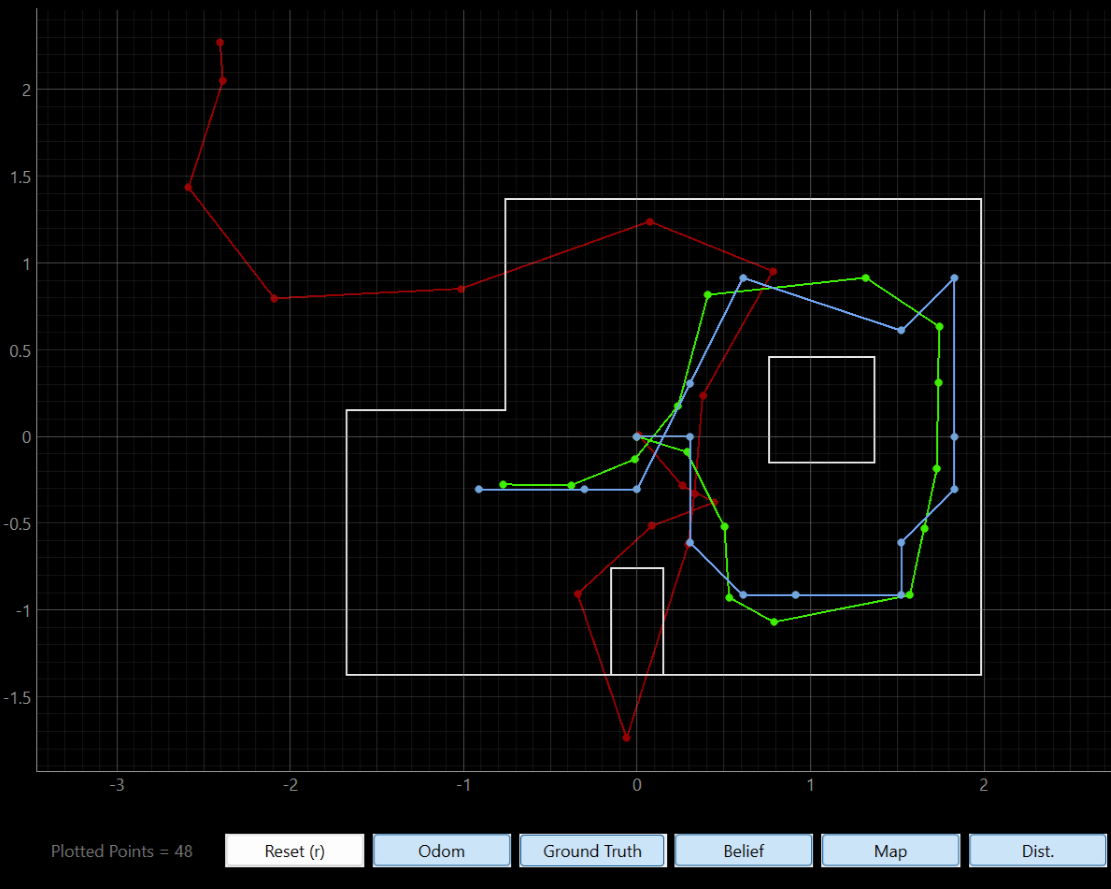 |
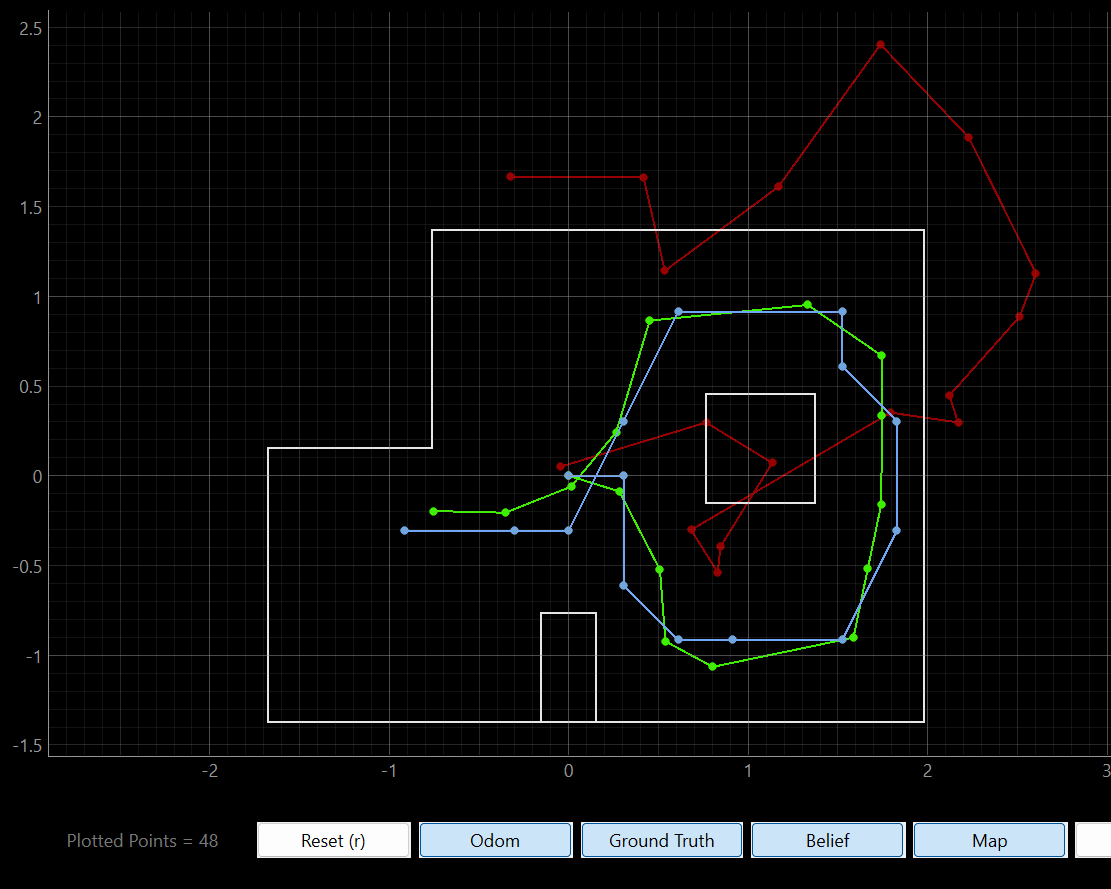 |
2. Implementation on the Robot
The base code for the Bayes Filter implamentation was also provided, but it needed some modifications. The function perform_observation_loop needs to be implemented. This function should ask the robot to turn 360 degrees and take readings every 20 degrees from a fixed point. These 18 readings need to be saved in a column array with the readings in meters. This function used the Bluetooth command MAP, which runs the code from Lab 9. That command returns the readings of both ToF sensors, as well as the angle for each reading. A notification handler was written to extract the individual readings.
1
2
3
4
5
6
7
8
9
10
11
12
13
14
15
16
17
18
def notification_handler_11(uuid, byte_array):
    global string
    global tofAData
    global tofBData
    global angleData
    global stringData

    string = ble.bytearray_to_string(byte_array)

    stringData.append(string)

    tofA=string.split("|",3)[0]
    tofB=string.split("|",3)[1]
    angle=string.split("|",3)[2]

    tofAData.append(float(tofA)/1000 + 0.06985)
    tofBData.append(float(tofB))
    angleData.append(float(angle))
Note how the notification handler saves the reading from the first ToF reading in meters, adding an offset of 69.85mm. This offset corresponds to the distance between the sensor and the center of the robot. It is assumed that the robot turns on its axis, so adding this offset to the readings should improve the localization results.
The perform_observation_loop function will ask the robot to perform a 360-degree turn, take 18 readings, and send them over Bluetooth. The notification handler will extract those values and store them in global variables. To maka sure all the data is sent, the function will wait unitl all 18 readings are available. Next, it will plot them in a polar plot for debuggin purposes. Last, it will save the readings from the front ToF sensor, and the angles, in column numpy arrays, which will be returned.
1
2
3
4
5
6
7
8
9
10
11
12
13
14
15
16
17
18
19
20
21
22
23
24
25
26
27
28
29
30
31
32
33
34
35
36
37
38
39
40
41
42
43
44
45
46
47
48
49
50
51
52
53
54
55
56
57
58
59
60
61
62
63
async def perform_observation_loop(self, rot_vel=120):
    """Perform the observation loop behavior on the real robot, where the robot does
    a 360 degree turn in place while collecting equidistant (in the angular space) sensor
    readings, with the first sensor reading taken at the robot's current heading.
    The number of sensor readings depends on "observations_count"(=18) defined in world.yaml.

    Keyword arguments:
        rot_vel -- (Optional) Angular Velocity for loop (degrees/second)
                    Do not remove this parameter from the function definition, even if you don't use it.
    Returns:
        sensor_ranges   -- A column numpy array of the range values (meters)
        sensor_bearings -- A column numpy array of the bearings at which the sensor readings were taken (degrees)
                           The bearing values are not used in the Localization module, so you may return a empty numpy array
    """

    # Global Variables need to be declared, as they are updated in the notification handler

    global tofAData
    global tofBData
    global angleData
    global stringData

    # Call MAP to perform a 360-degree turn, and take readings every 20 degrees

    tofAData = []
    tofBData = []
    angleData = []
    stringData = []
    ble.send_command(CMD.MAP,"17|20|3|0|1.2")

    # Wait until all the data is sent (that is, 18 readings)

    while len(tofAData) < 18:
        await sleep_for_3_secs()

    # For debugging purposes, plot the data
    # The angles will be saved and manipulated in a second variable
    angleData2 = angleData

    # Transform angles to rads for polar plot
    for i in range(0,len(angleData)):
        angleData2[i] = ((angleData2[i])%360)*np.pi/180

    #Make plt figure
    fig = plt.figure()
    #Make sub-plot with attribute "polar"
    ax = fig.add_subplot(polar=True)
    #Plot function
    ax.plot(angleData2, tofAData, '-o', label = "ToF 1")
    #Show plot
    plt.legend(loc="upper right")
    plt.show()

    # Convert the readings to a numpy array, and make it a column
    tofAData = np.array(tofAData)
    angleData = np.array(([]))

    sensor_ranges = np.array(tofAData)[np.newaxis].T
    sensor_bearings = np.array(angleData)[np.newaxis].T

    return sensor_ranges, sensor_bearings

    raise NotImplementedError("perform_observation_loop is not implemented")
Note that when waiting, the function sleep_for_3_secs is called to sleep for 3 seconds until all 18 readings are obtained.
1
2
async def sleep_for_3_secs():
    await asyncio.sleep(3)
The use of this function forces the use of the async and await command in every function that is involved in the process:
async def perform_observation_loop(self, rot_vel=120):.await loc.get_observation_data().- And:
1
2
async def get_observation_data(self, rot_vel=120):
    self.obs_range_data, self.obs_bearing_data = await self.robot.perform_observation_loop(rot_vel)
3. Localization
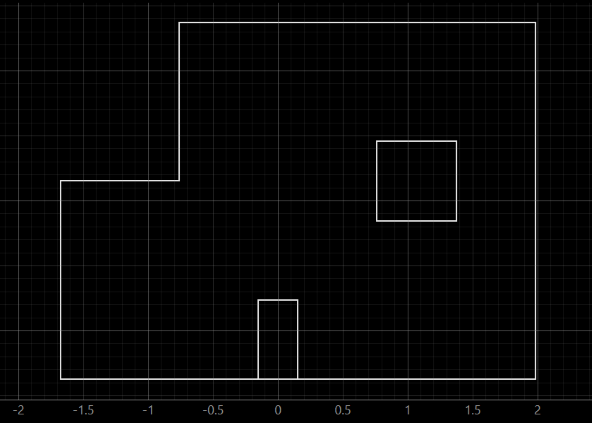
The orientation control to turn and take measurements was tuned with Kp = 3, Ki = 0, and Kd = 1.2. The Bayes Filter is then implemented in the robot. For the prediction step, a uniform prior is assumed, as the motion of the robot is unreliable. The update step is implemented with the code from above. The localization code was run at the four points of the map. However, when working on the lab I found out that the actual map was different from the map coded for the simulation and the plotter. The big box was one tile above its supposed location, as you can see in the following comparison.
| Lab 9 Map | Map for Simulation | Both Maps Overlaid |
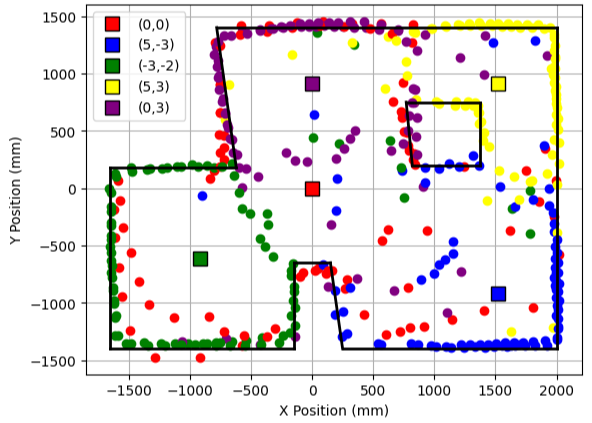 |
 |
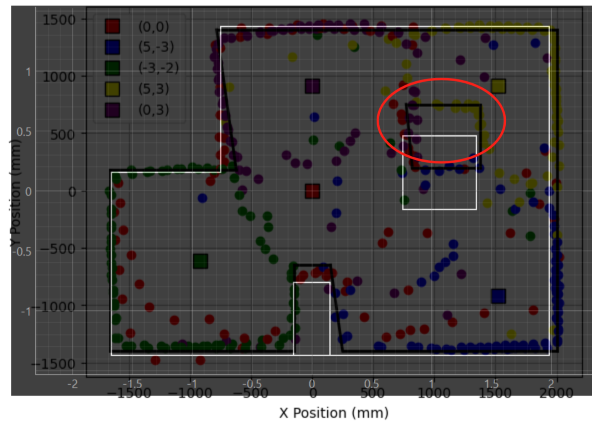 |
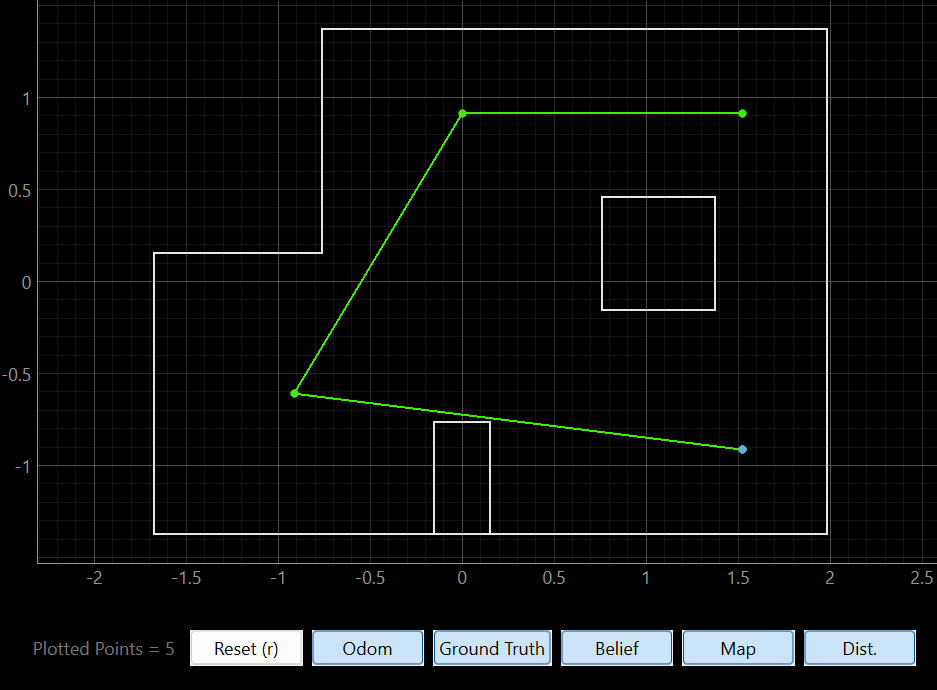
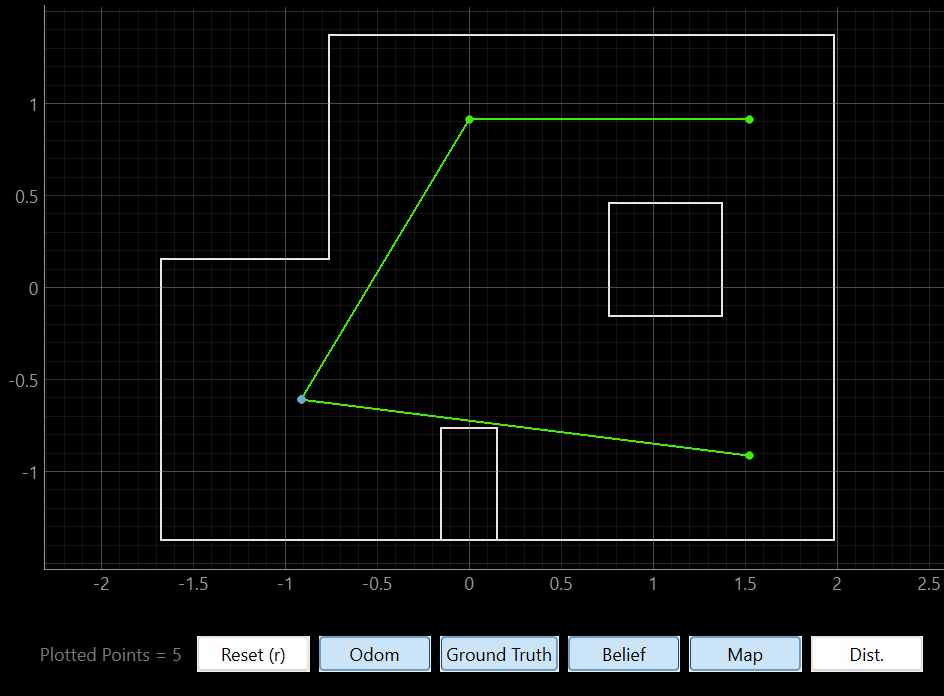
After realizing that and speking with TA Rafi, we decided to move the box to its location in the simulation map. Next, the localization algorithm was run at every spot. The results are shown below. The green dots are the real points where the robot is in the map, and the blue dot is the result of the Bayes Filter.
1. Point (5,-3)
2. Point (-3,-2)
3. Point (5,3)
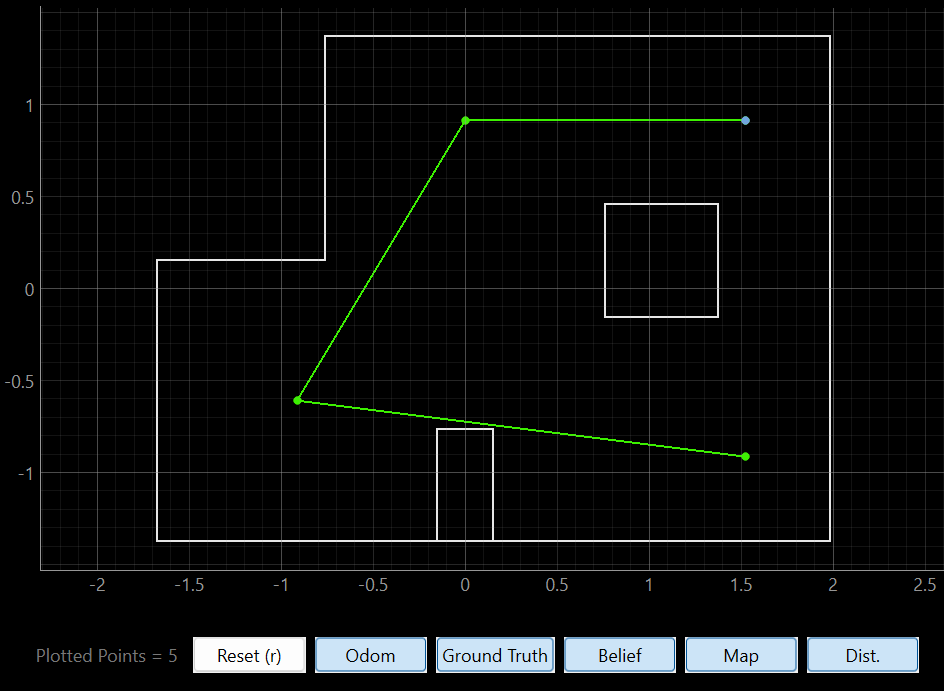
4. Point (0,3)
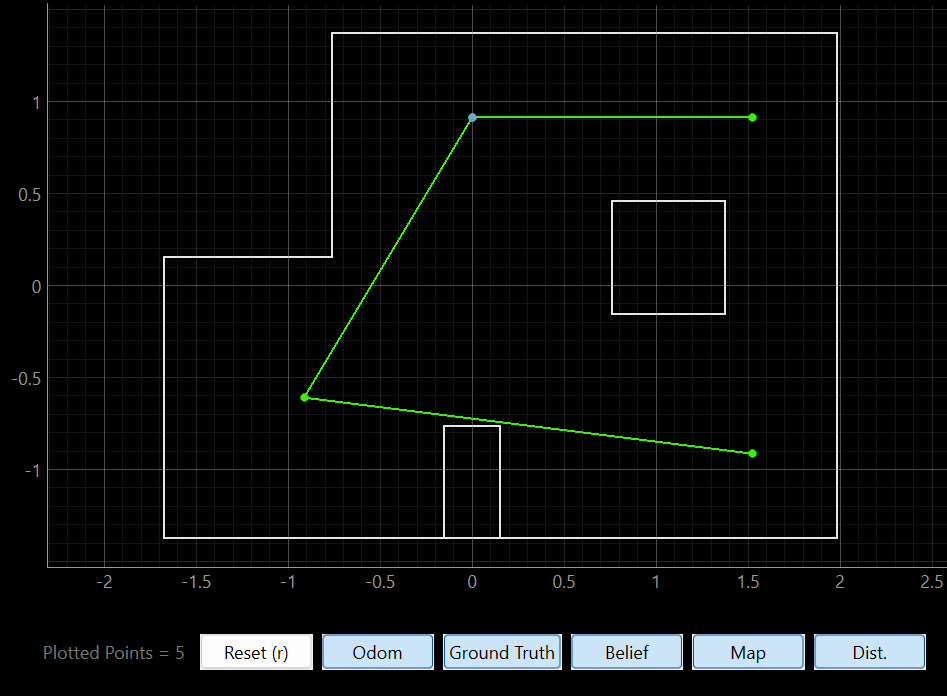
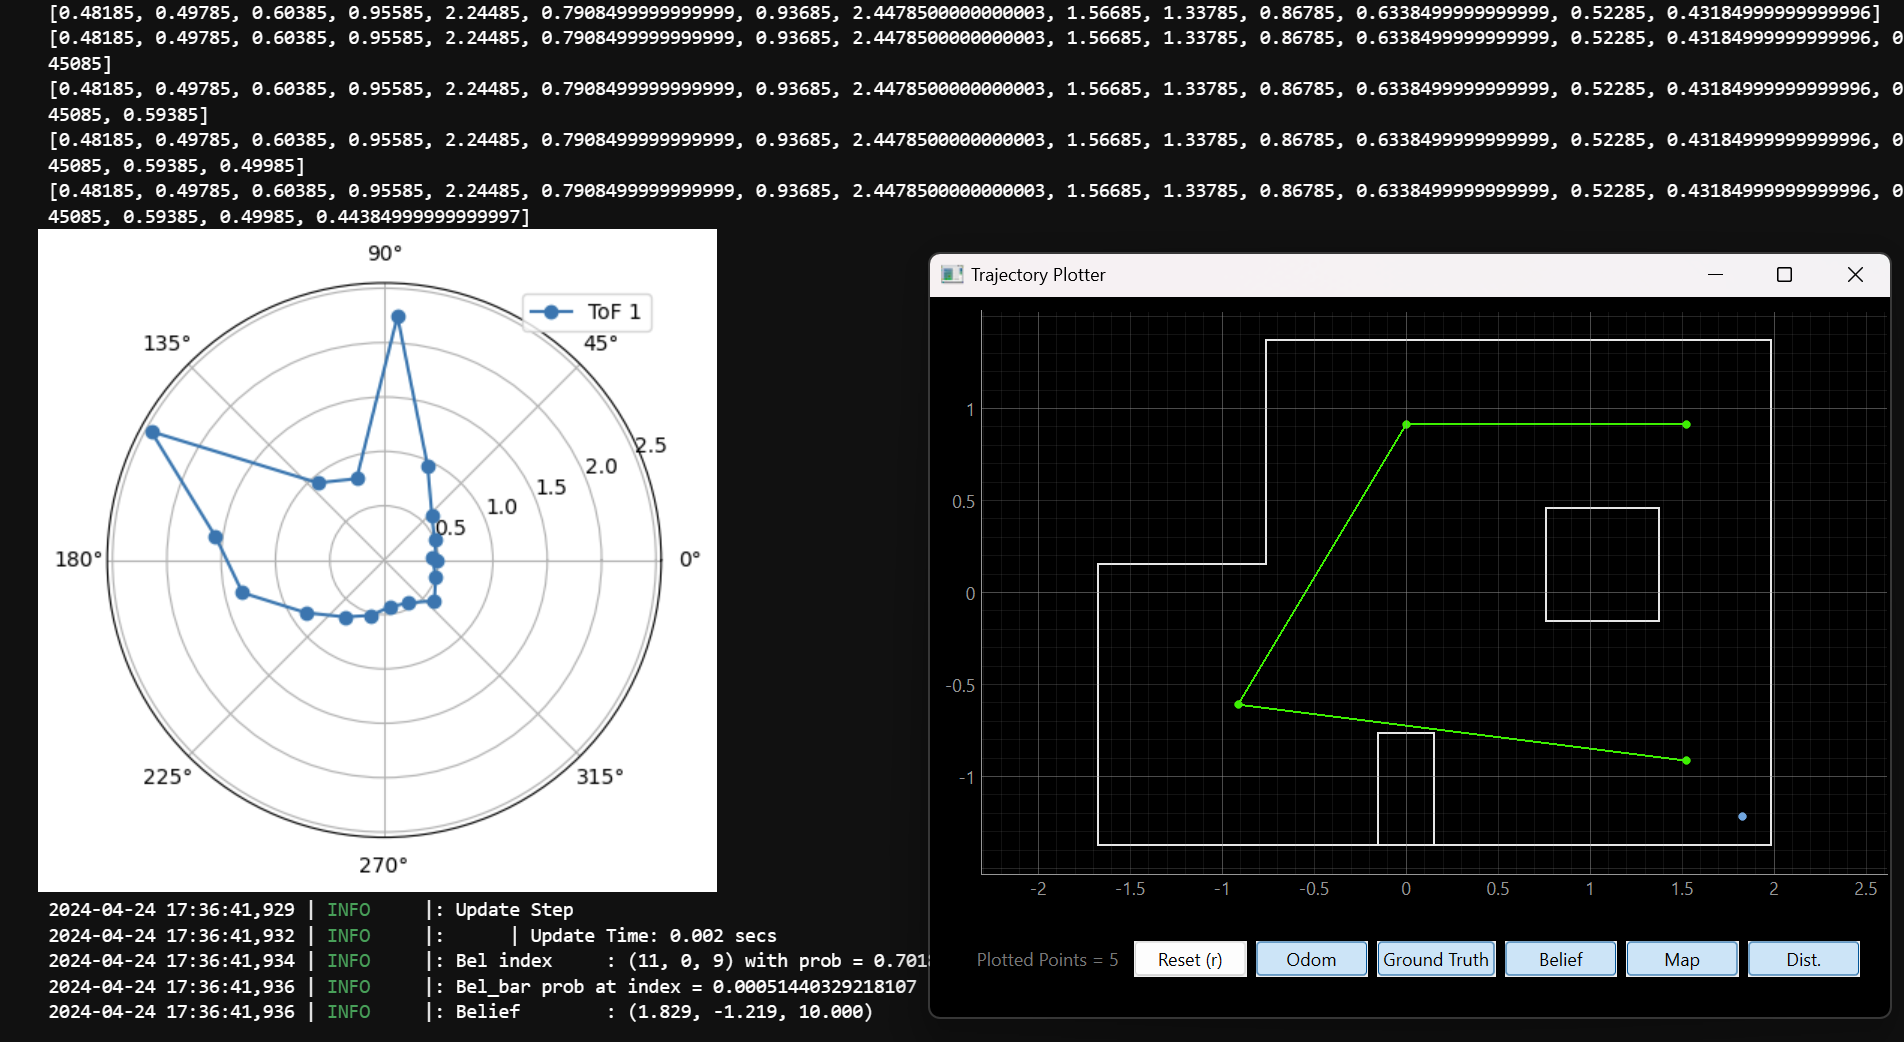
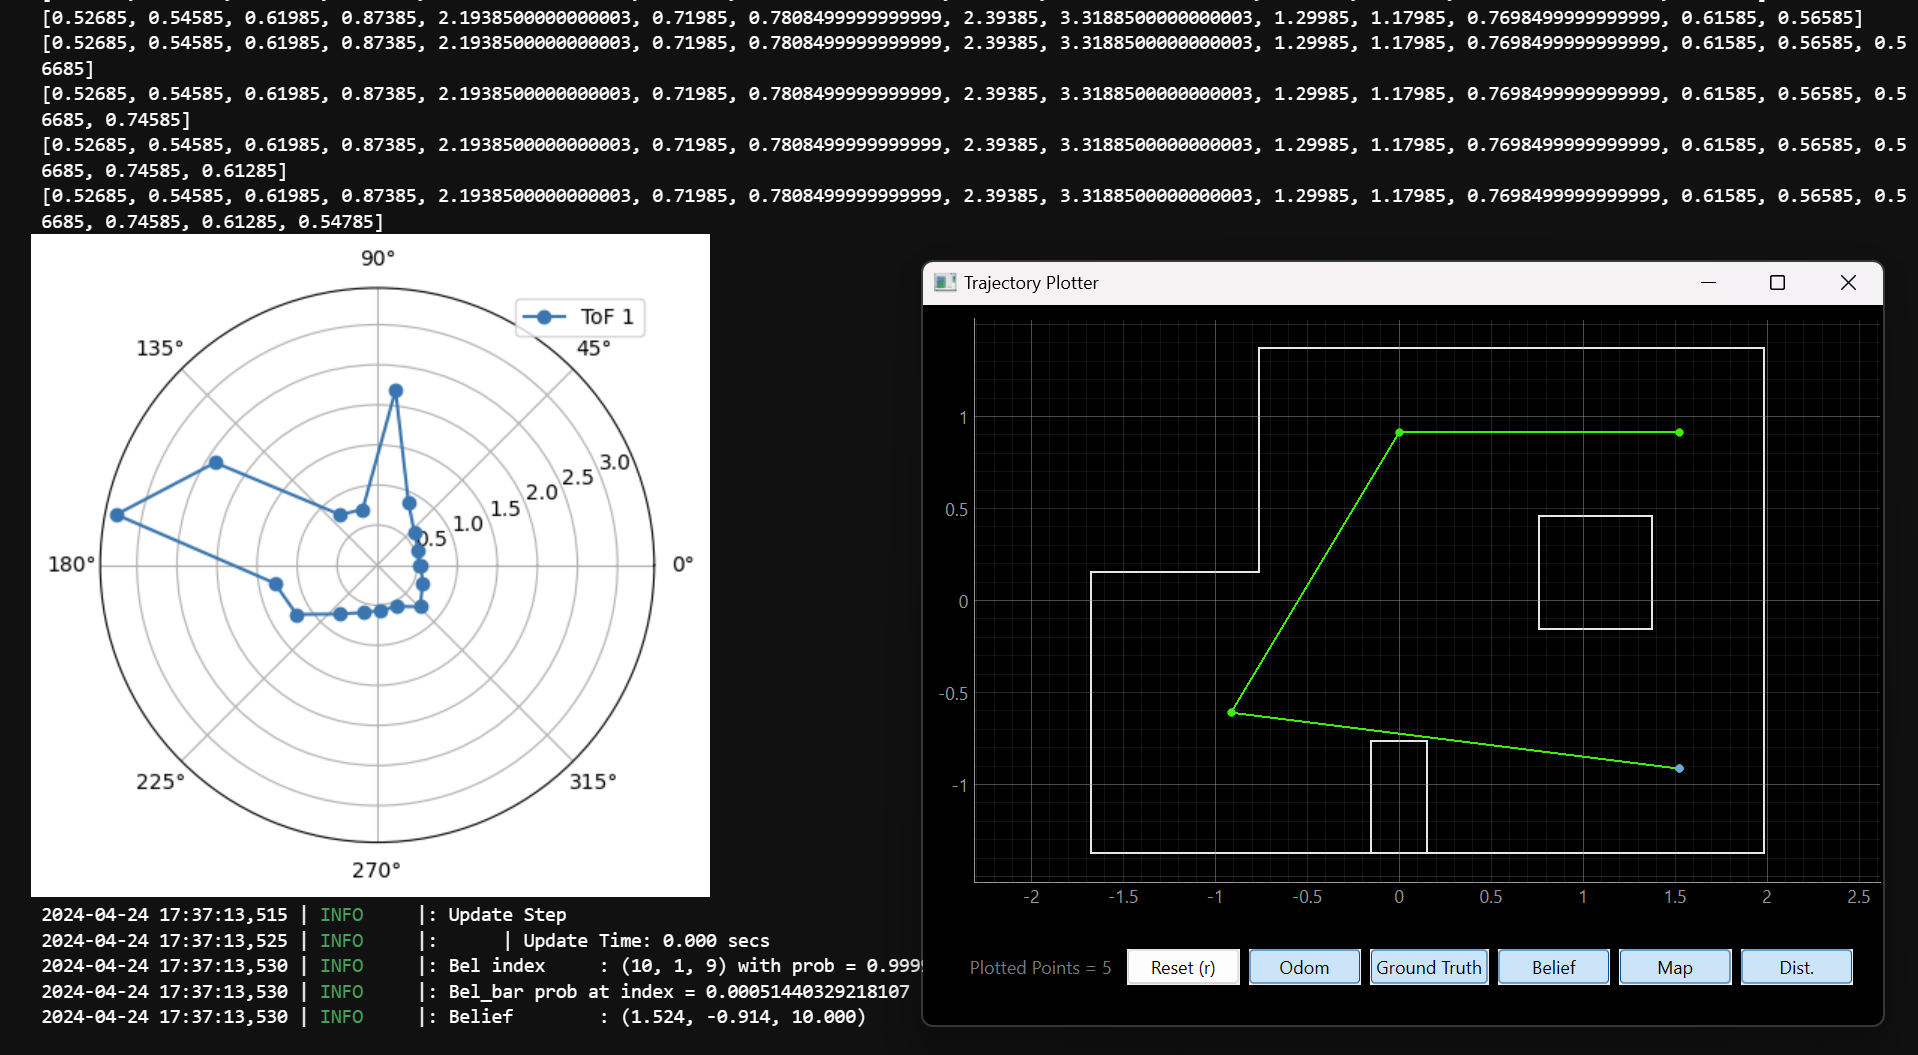
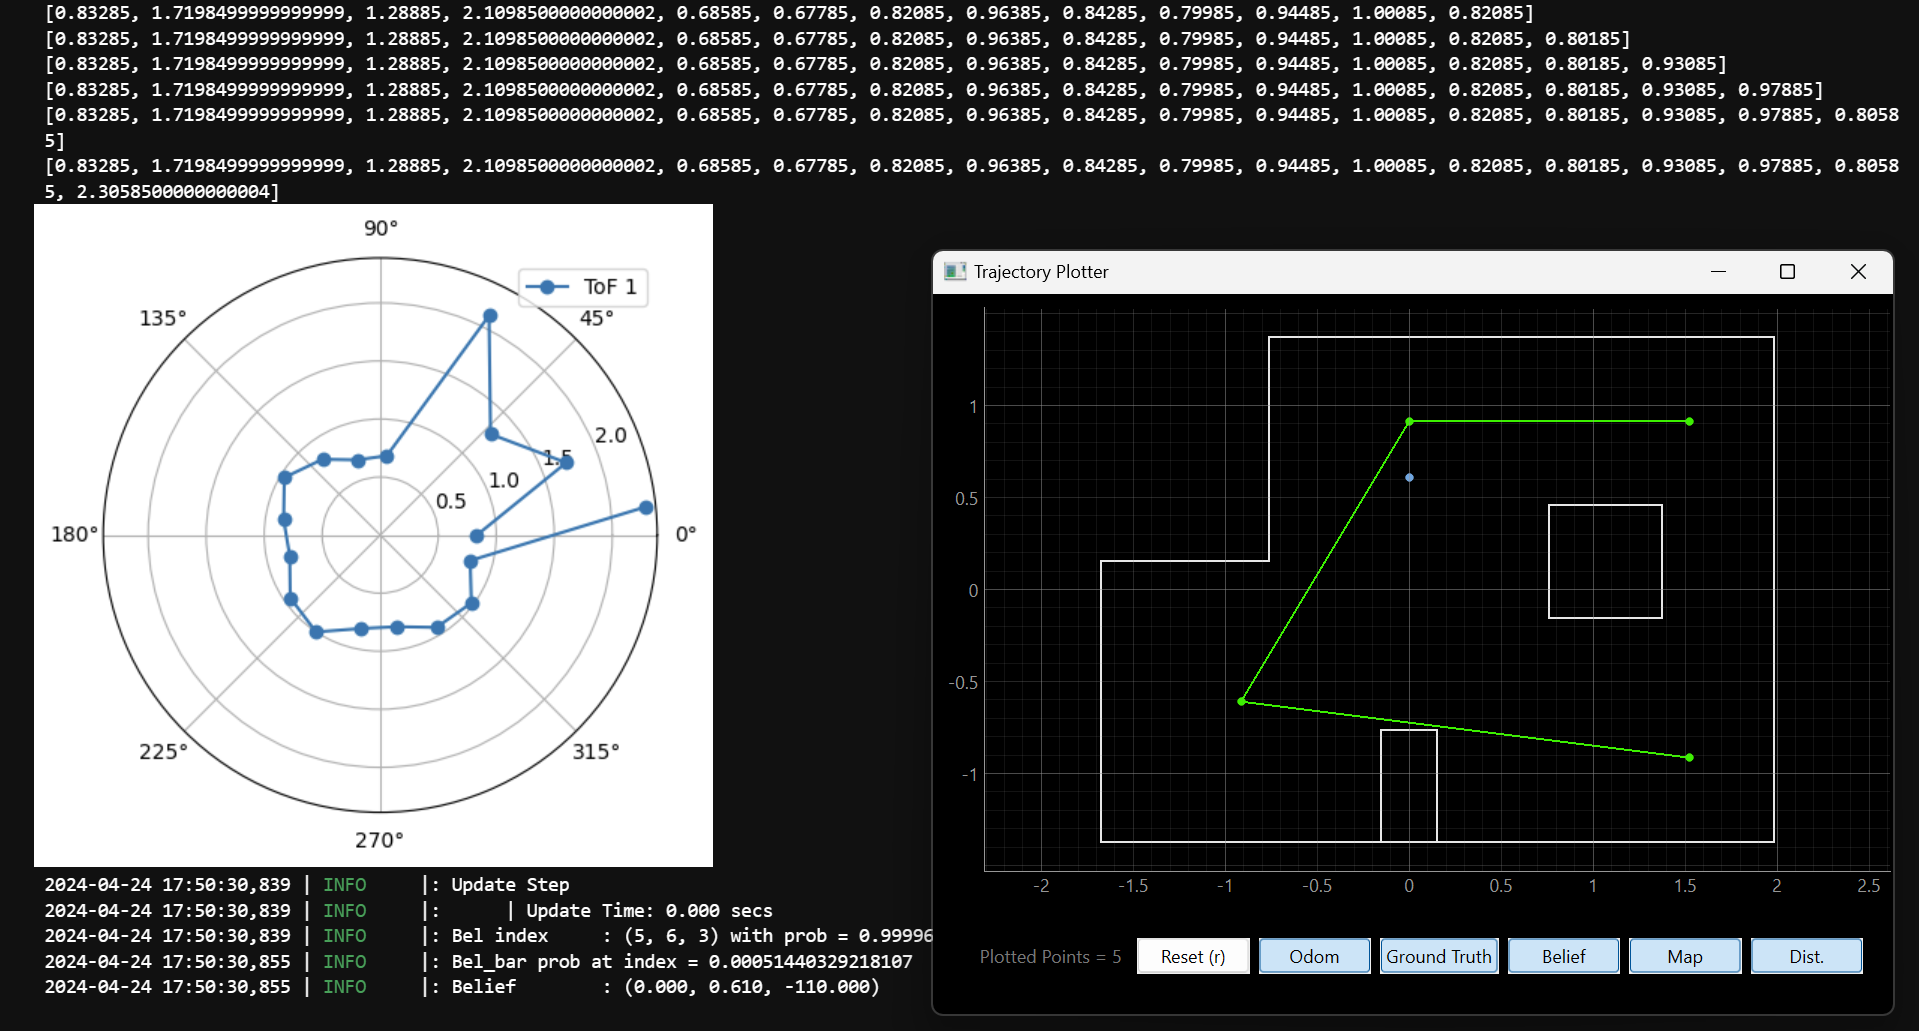
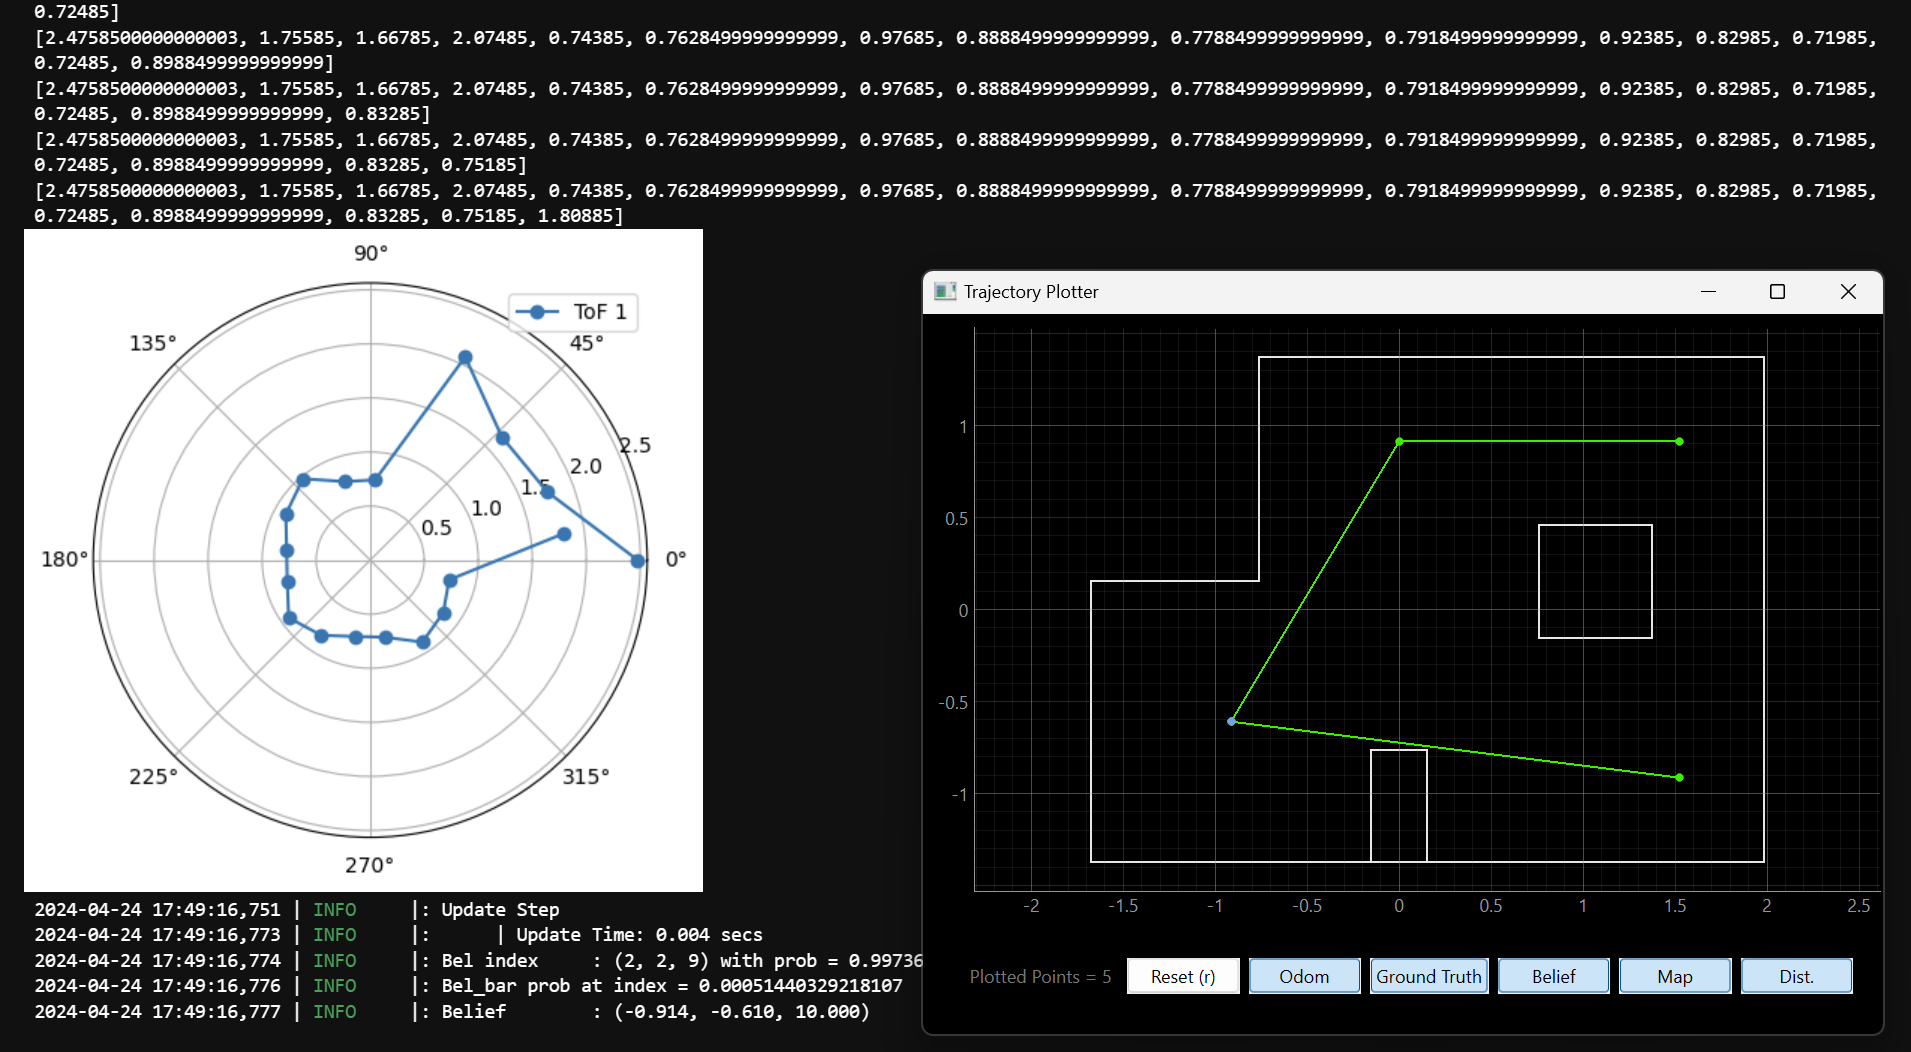
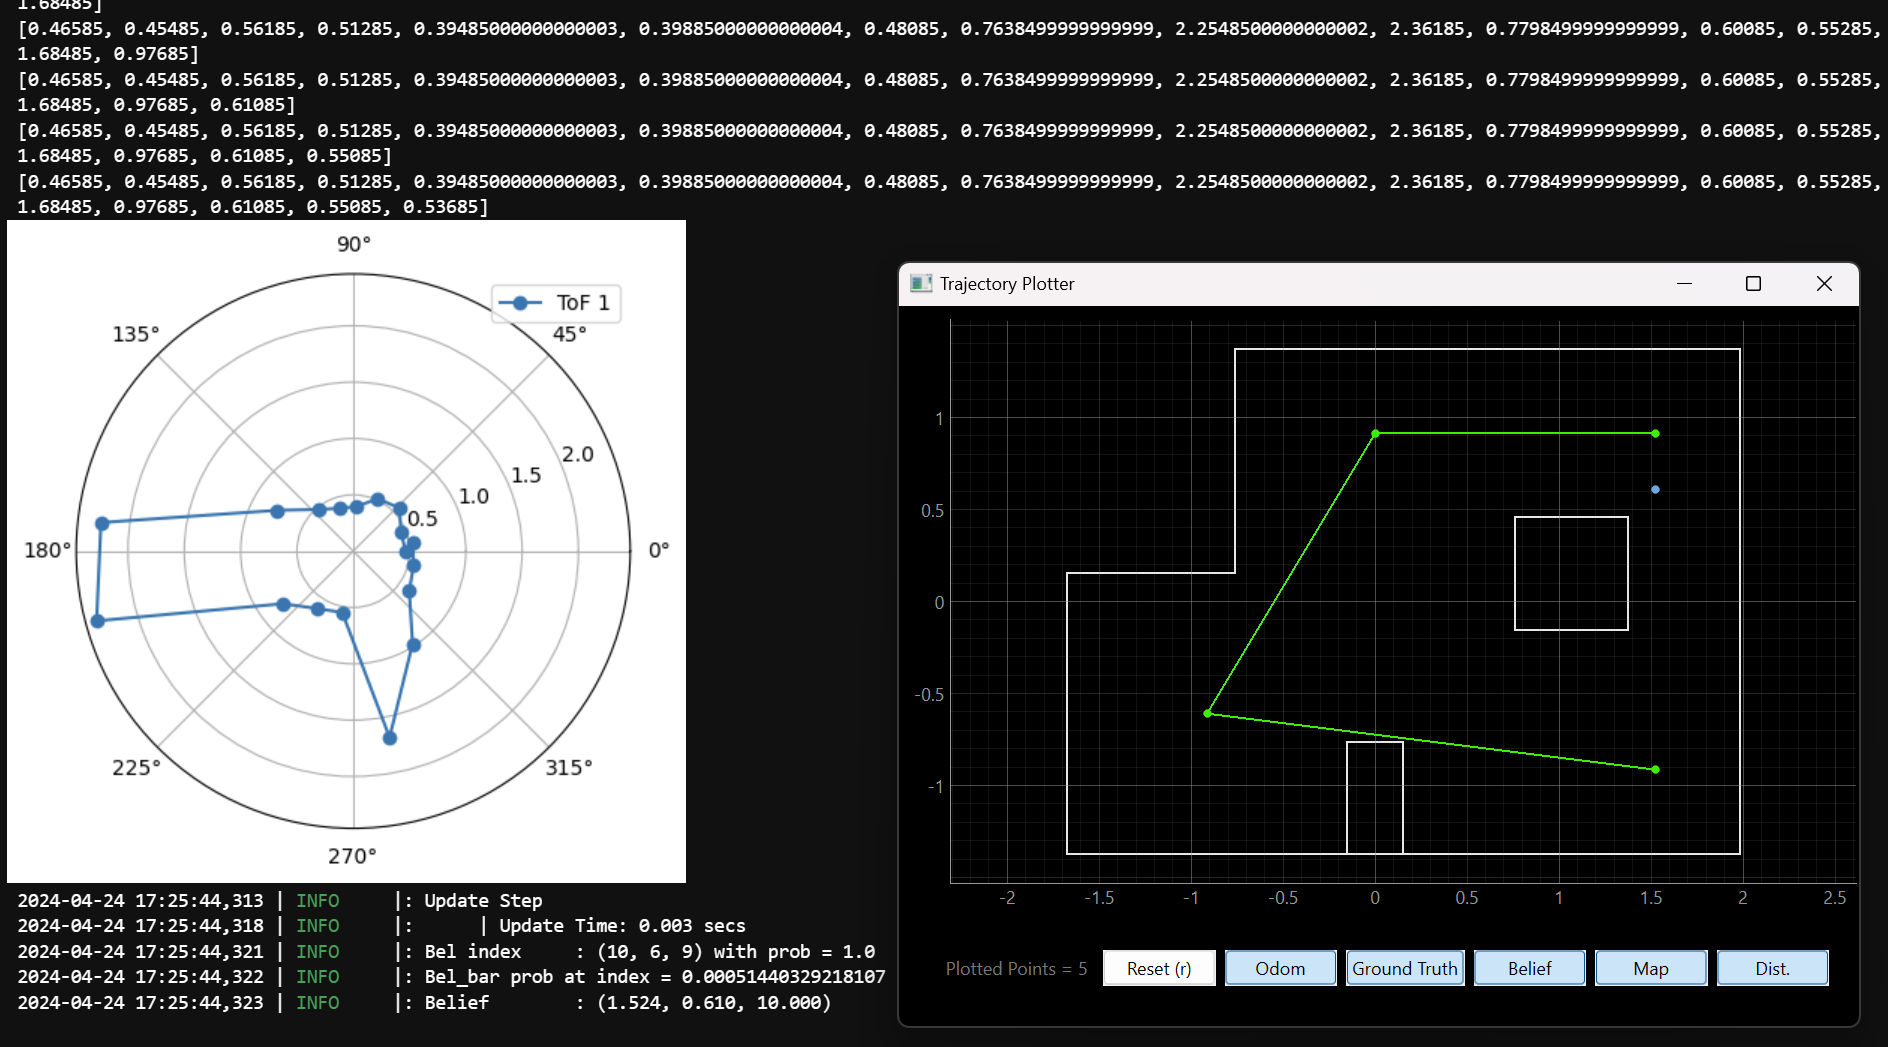
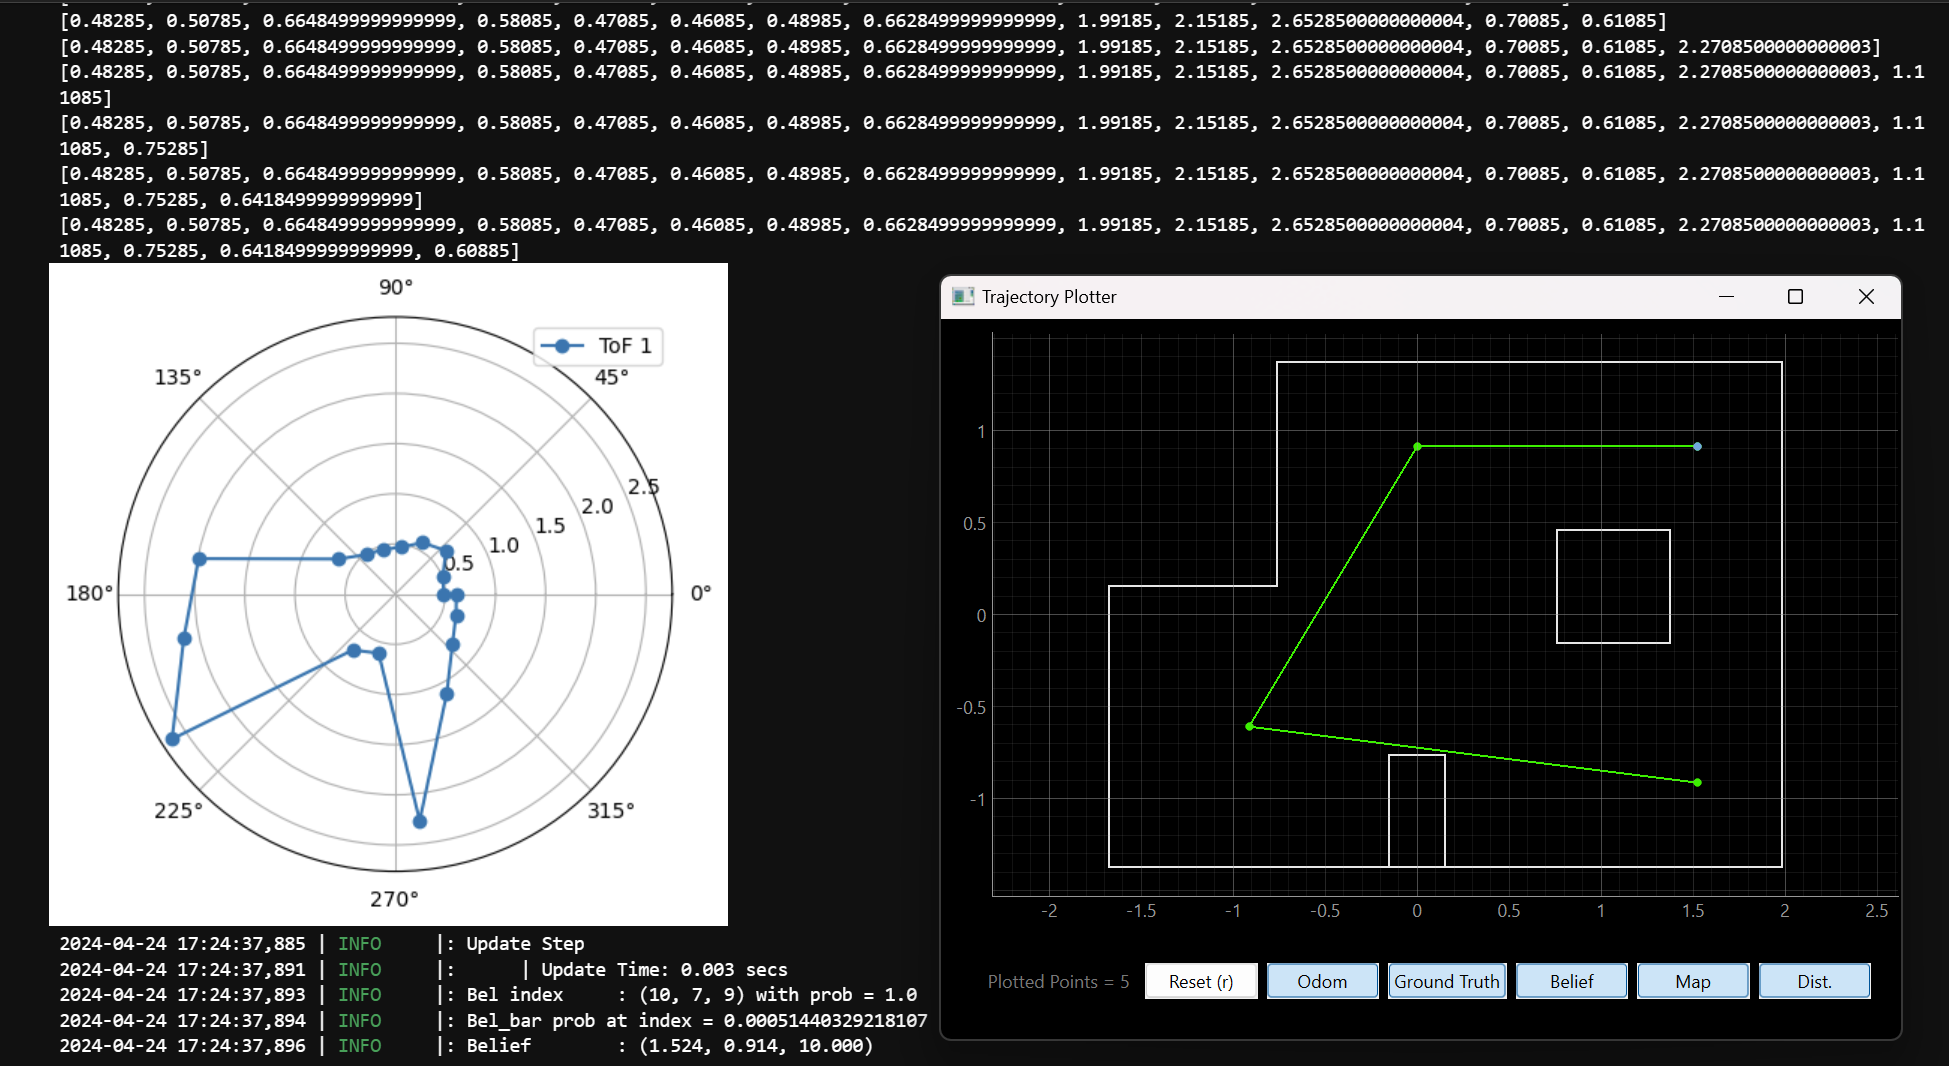
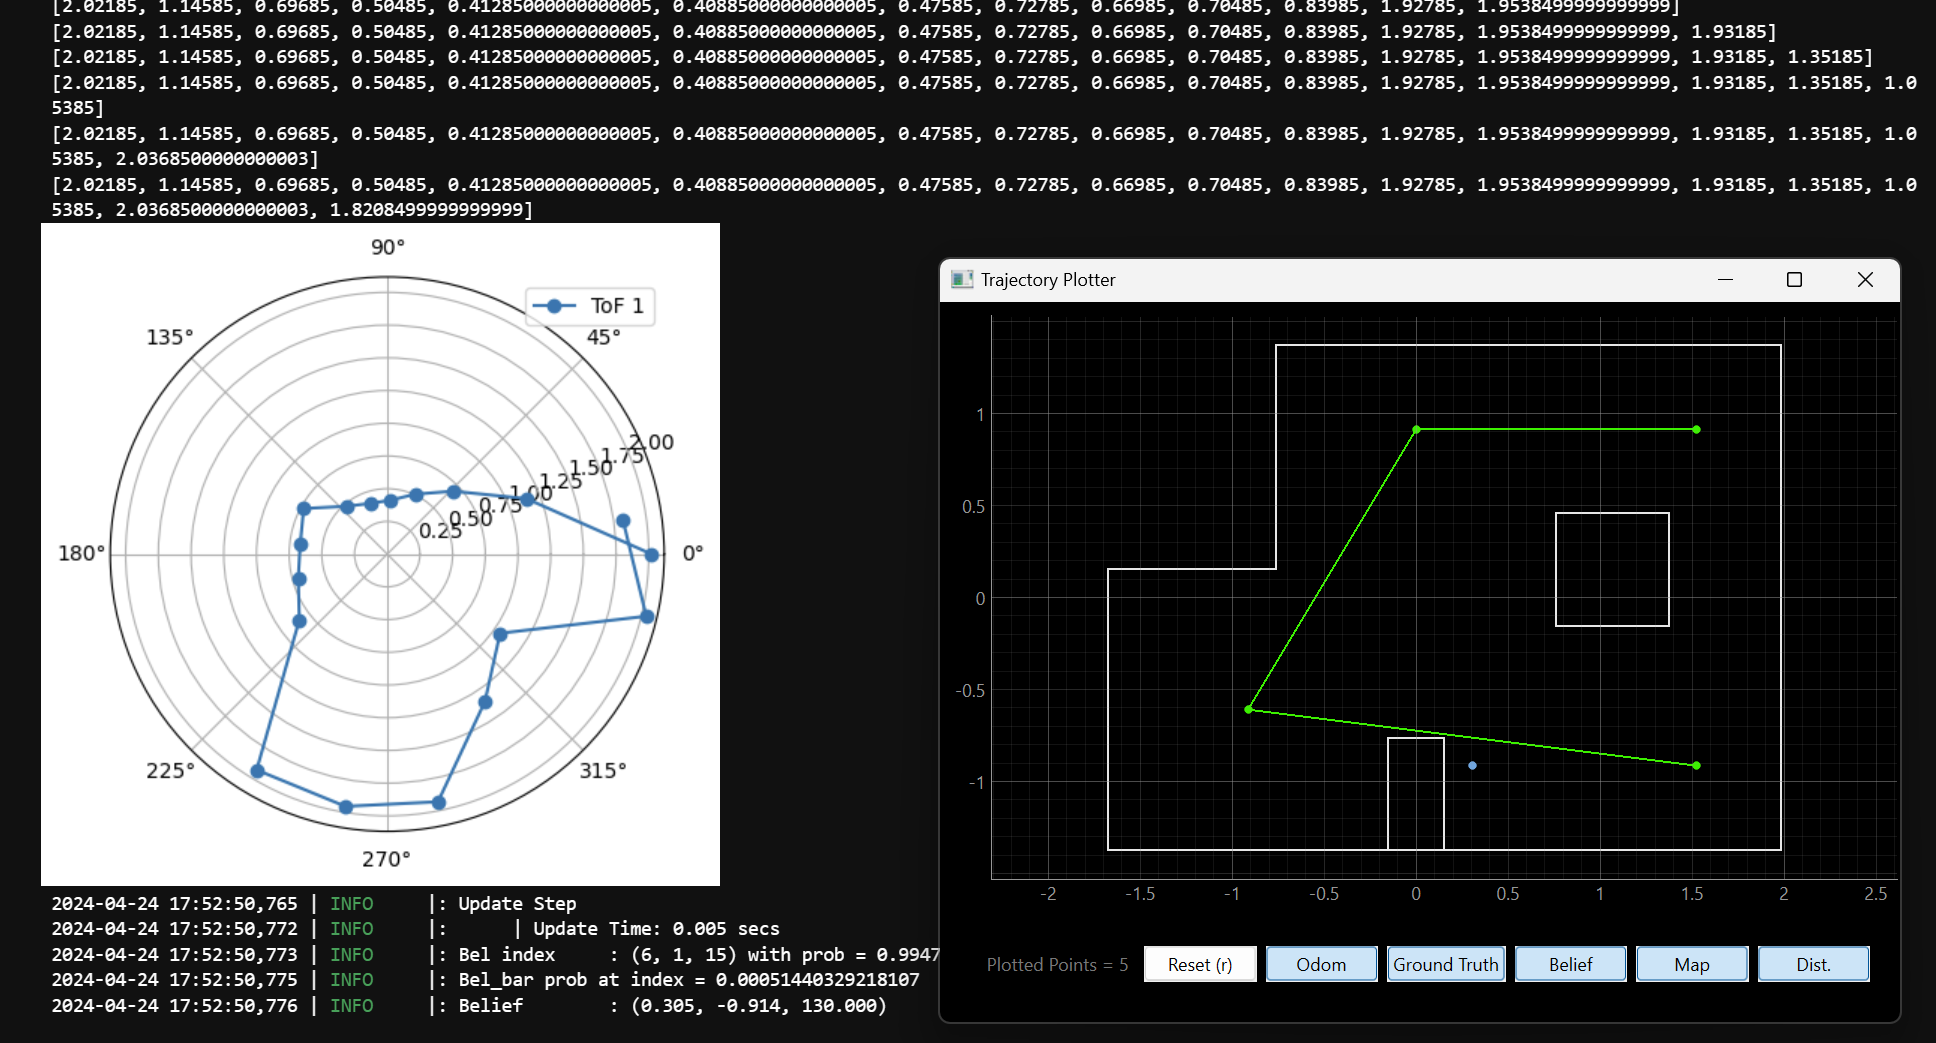
Note how the results above show that the Bayes Filter was always correct. However, this was not always the case. Below, for every point, are shown 2 different results from running the algorithm: one is correct, one is not (sometimes it misses by just a tile, sometimes it misses completely).
1. Point (5,-3)
| Failed Localization | Correct Prediction |
 |
 |
2. Point (-3,-2)
| Failed Localization | Correct Prediction |
 |
 |
3. Point (5,3)
| Failed Localization | Correct Prediction |
 |
 |
4. Point (0,3)
| Failed Localization | Correct Prediction |
 |
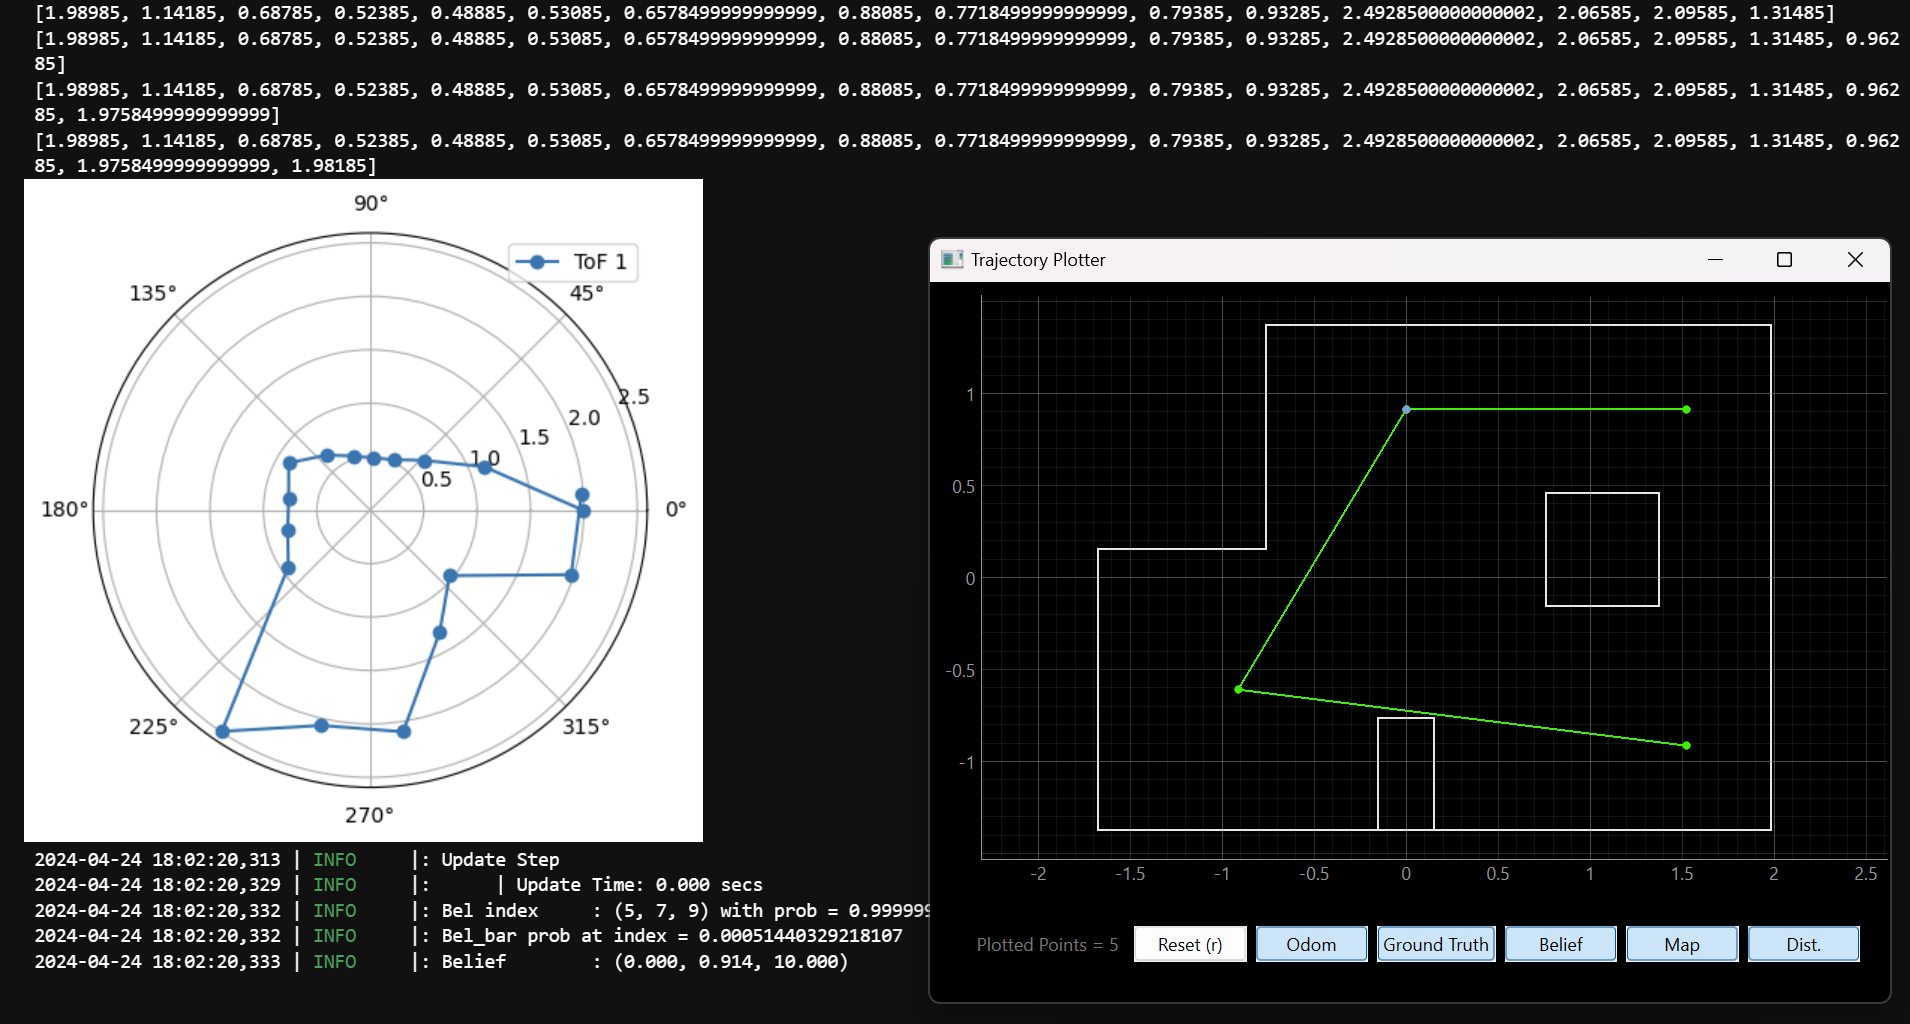 |
We can see that for all cases, a difference in a single reading can lead to a failed prediction from the Bayes Filter. For example, in Point 3, the reading at ~220 degrees is the only significant different reading between the failed and the correct one. A single difference in a reading can make the Bayes Filter predict a completely incorrect state.
Conclusion
The Bayes Filter is a powerful tool to predict the state of the robot in a map. However, it is dependent on the redings obtained in the robot. A noisy sensor will produce inconsistent results, so the predicted state won’t be reliable in many cases.